
Easy Shading on the Web with C3dapp Studio

This blog goes through the sessions and steps of using C3dapp Studio to create an in-browser shading app that draws a set of traffic lights.
Line-by-line codings arranged in sessions with visible results are provided with minimum or no explanation, aiming for the quickest way to arrive at the hinted outcomes.
More detailed tutorials about drawing and interacting with traffic lights can be found as Tutorial Volume 1 – Essential Shading in C3dapp Studio:
It takes about 30 minutes to enter the codings from this blog in C3dapp Studio and view the results of the coding sessions.
1. Overview
C3dapp Studio is a cloud environment in which you can write 3D apps using Java programming language and run them in a web browser. There is no need to install any software components, such as the Java compiler or an Integrated Development Environment (IDE), on your computer. All you need to do is to run C3dapp Studio in a web browser on a computer with internet access, as long as the web browser is relatively new, i.e. is WebGL capable.
The Case Editor in C3dapp Studio supports inline shading within the App Code. You can include vertex shader and fragment shader GLSL codes in the Java App Code with simplifications on GPU data input and data organization.
Although knowledges of the Java language, the GLSL language, and some basic graphics concepts are useful, neither is essential for going through the steps in the blog.
2. Prepare to work on the case in C3dapp Studio
Open a web browser on your computer. Start the C3dapp Studio in the browser with the following link:
https://app.oakhousesoftware.com/c3dapp-studio/
Click on tab ‘Case Editor’, then click on ‘Create a new case‘. A C3dapp case with title ‘New Case‘ is automatically prepared for you. Change the Case title to ‘TrafficLightS1‘.
3. Write the Java and shader GLSL codes for the case
In C3dapp Studio, Java codes and embedded GLSL shader codes for a C3dapp case can be worked on in the code editing box in the Case Editor panel. As a new C3dapp case, a few coding lines have been pre-prepared in the code editing box.
The code editing box as a multiline text editor has typical text editing capabilities. If you tap or click inside the code editing box, a text inserting caret is shown. You may move the caret around, insert text by typing on keyboard, and delete characters with the backspace key. Text can be selected by pointer dragging, or Ctrl+A to select all. Use Ctrl+C to copy selected text to clipboard, and use Ctrl+V to paste clipboard content to the text at the caret position. Other useful shortcuts include Ctrl+X for cut and Ctrl+Z for undo.
With an Apple Mac keyboard, use the Cmd key in place of the Ctrl key for the above shortcuts.
You may practise with text editing and copying/pasting to familiarise with how the coding lines can be worked on. The easiest way to work through the tutorial is to copy coding lines from this blog and paste them in the Case Editor’s code editing box at required caret locations.
Tip: When following the coding sessions, if you are unsure where a coding line should be inserted, scroll down to the end of the blog to see the full code.
Coding Session 1 – Painting
S1-1. Starting with the minimum App Code
In Case Editor of C3dapp Studio, after ‘Create a new case’ done in section 2 above, you’ll see the following coding lines in the code editing box:
package com.ohs.gt.client;

import dmive.core3d.app.AppClient3D;

public class GtAppClient extends AppClient3D {

}
In case your code editing box contains text lines that are not the same as the above lines, you should delete the contents in your code editing box, copy the above lines, and paste them into your code editing box.
Make sure that the Case title is ‘TrafficLightS1‘. Click on ‘Build C3dapp for the case‘ to build and run the case.
If the building process is successful, C3dapp Studio switches to the ‘Built Cases’ tab within which an app with black background is displayed under the case title ‘TrafficLightS1‘.
Click on ‘Open case‘ under the case title ‘TrafficLightS1‘ to get back to Case Editor.
Note that the Case tile is now TrafficLightS1_1. Change it to TrafficLightS2.
Coding Session 2 – Repainting
S2-1. After the line which starts with import, add the following line:
import dmive.core3d.intf.Grapher;
S2-2. Before the final line which contains only the closing curly bracket }, add the following lines:
    private Grapher gph;

    @Override
    public void canvasReady() {
    }

    @Override
    public void postUpdate() {
}S2-3. In the method canvasReady, add the following line:
gph = getGrapher();
S2-4. In the method postUpdate, add the following line:
gph.setBackground(0.5f, 0.5f, 0.5f, 1.0f);
Make sure that the Case title is ‘TrafficLightS2‘. Click on ‘Build C3dapp for the case‘ to build and run the case.
If the building process is successful, C3dapp Studio switches to the ‘Built Cases’ tab within which an app with gray background is displayed under the case title ‘TrafficLightS2‘.

Click on ‘Open case‘ under the case title ‘TrafficLightS2‘ to get back to Case Editor.
Note that the Case tile is now TrafficLightS2_1. Change it to TrafficLightS3.
Coding Session 3 – Shading
S3-1. After the line containing private Grapher gph, add the following line:
private int program;
S3-2. In the canvasReady method, add the following line after the existing line:
program = gph.initProgram(0);
S3-3. In the postUpdate method, after the line containing gph.setBackground, add the following lines:
        gph.bindProgram(program);
        gph.drawPoints(1);
        gph.unbindProgram();
S3-4VS. Continue in the postUpdate method, after the line containing bindProgram(program), add the following vertex shader lines:
        /*------------------------------------------------- vertex shader for P0
        void main() {
            gl_Position = vec4(0, 0, 0, 1);
        }
S3-5FS. Continue in the postUpdate method, after the vertex shader lines, add the following fragment shader lines:
        //~~~~~~~~~~~~~~~~~~~~~~~~~~~~~~~~~~~~~~~~~~~~~~~~~~~~~~ fragment shader
        void main() {
            gl_FragColor = vec4(1, 1, 1, 1);
        }
        //-------------------------------- end of vertex and fragment shaders */
Make sure that the Case title is ‘TrafficLightS3‘. Click on ‘Build C3dapp for the case‘ to build and run the case.
If the building process is successful, C3dapp Studio switches to the ‘Built Cases’ tab within which an app with gray background is displayed under the case title ‘TrafficLightS3‘. Note that there is actually a white dot drawn at the centre of the gray canvas, but it may not be easy to see.
Click on ‘Open case‘ under the case title ‘TrafficLightS3‘ to get back to Case Editor.
Note that the Case tile is now TrafficLightS3_1. Change it to TrafficLightS4.
Coding Session 4 – Size
S4-1. After the line containing private int program, add the following line:
private float pointSizeGu;
S4-2. In the canvasReady method, add the following line after the existing lines:
pointSizeGu = 60 * gph.getPGR();
S4-3. In the postUpdate method, after the line containing bindProgram(program), add the following line:
gph.sendUfloatPointSize("pointSize", pointSizeGu);
S4-4VS. In the main() function of the vertex shader, add the following line after the existing line:
gl_PointSize = pointSize;
Make sure that the Case title is ‘TrafficLightS4‘. Click on ‘Build C3dapp for the case‘ to build and run the case.
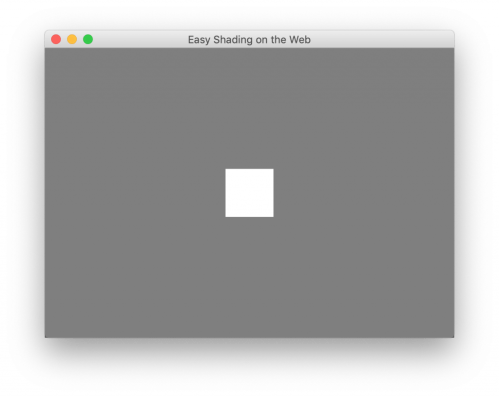
If the building process is successful, C3dapp Studio switches to the ‘Built Cases’ tab within which an app showing a white square is displayed under the case title ‘TrafficLightS4‘.
Click on ‘Open case‘ under the case title ‘TrafficLightS4‘ to get back to Case Editor.
Note that the Case tile is now TrafficLightS4_1. Change it to TrafficLightS5.
Coding Session 5 – Color
S5-1. After the line containing private float pointSizeGu, add the following line:
private float[] pointColor;
S5-2. In the canvasReady method, add the following line after the existing lines:
pointColor = new float[]{1.0f, 0.0f, 0.0f};
S5-3. In the postUpdate method, after the line containing sendUfloatPointSize("pointSize", add the following line:
gph.sendUvec3("color", pointColor);
S5-4FS. In the main() function of the fragment shader, disable the following line with double slashes:
//gl_FragColor = vec4(1, 1, 1, 1);
S5-5FS. Continue in the main() function of the fragment shader, add the following line after the existing line:
gl_FragColor = vec4(color, 1);
Make sure that the Case title is ‘TrafficLightS5‘. Click on ‘Build C3dapp for the case‘ to build and run the case.
If the building process is successful, C3dapp Studio switches to the ‘Built Cases’ tab within which an app showing a red square is displayed under the case title ‘TrafficLightS5‘.

Click on ‘Open case‘ under the case title ‘TrafficLightS5‘ to get back to Case Editor.
Note that the Case tile is now TrafficLightS5_1. Change it to TrafficLightS6.
Coding Session 6 – Shape
S6-1. After the line containing private float[] pointColor, add the following line:
private float cornerRad;
S6-2. In the canvasReady method, add the following line after the existing lines:
cornerRad = 0.5f;
S6-3. In the postUpdate method, after the line containing sendUvec3("color", add the following line:
gph.sendUfloat("rad", cornerRad);
S6-4FS. In the main() function of the fragment shader, disable the following line with double slashes:
//gl_FragColor = vec4(color, 1);
S6-5FS. Continue in the main() function of the fragment shader, add the following lines after the existing lines:
            vec2 pfa = abs(gl_PointCoord - 0.5);
            vec2 vq1 = max(pfa + rad - 0.5, vec2(0, 0));
            gl_FragColor = vec4(color, length(vq1) < rad);
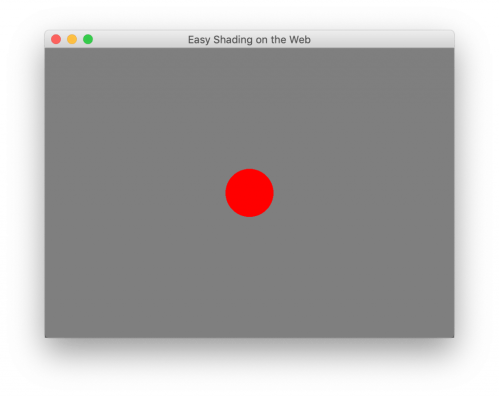
Make sure that the Case title is ‘TrafficLightS6′. Click on ‘Build C3dapp for the case‘ to build and run the case.
If the building process is successful, C3dapp Studio switches to the ‘Built Cases’ tab within which an app showing a red disk is displayed under the case title ‘TrafficLightS6′.
Click on ‘Open case‘ under the case title ‘TrafficLightS6′ to get back to Case Editor.
Note that the Case tile is now TrafficLightS6_1. Change it to TrafficLightS7.
Coding Session 7 – Position
S7-1. After the line containing private float cornerRad, add the following line:
private float[] pointPosWs;
S7-2. In the canvasReady method, add the following line after the existing lines:
pointPosWs = new float[]{0.0f, 0.5f};
S7-3. In the postUpdate method, after the line containing sendUfloat("rad", add the following line:
gph.sendUvec2("pos", pointPosWs);
S7-4VS. In the main() function of the vertex shader, disable the following line with double slashes:
//gl_Position = vec4(0, 0, 0, 1);
S7-5VS. Continue in the main() function of the vertex shader, after the disabled line containing gl_Position, add the following line:
gl_Position = vec4(pos, 0, 1);
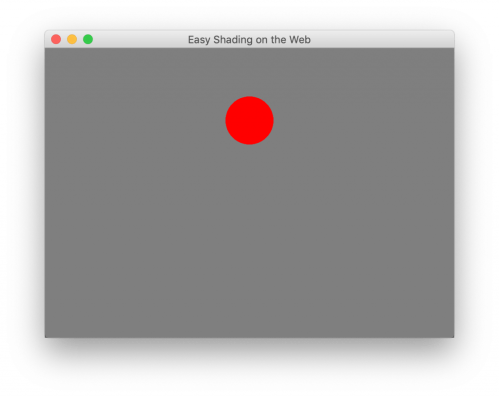
Make sure that the Case title is ‘TrafficLightS7′. Click on ‘Build C3dapp for the case‘ to build and run the case.
If the building process is successful, C3dapp Studio switches to the ‘Built Cases’ tab within which an app showing a red disk some distance above the centre is displayed under the case title ‘TrafficLightS7′.
Click on ‘Open case‘ under the case title ‘TrafficLightS7′ to get back to Case Editor.
Note that the Case tile is now TrafficLightS7_1. Change it to TrafficLightS8.
Coding Session 8 – Number
S8-1. Disable the following line with double slashes:
//private float[] pointPosWs;
S8-2. In the canvasReady method, disable the following line with double slashes:
//pointPosWs = new float[]{0.0f, 0.5f};
S8-3. In the postUpdate method, disable the following line with double slashes:
//gph.sendUvec2("pos", pointPosWs);
S8-4. Continue in the postUpdate method, blow the fragment shader, disable the following line with double slashes:
//gph.drawPoints(1);
S8-5. Back to the top part of the code, after the disabled line which contains private float[] pointPosWs, add the following line:
private int pointPosWsBuf;
S8-6. In the canvasReady method, add the following lines after the existing lines:
        pointPosWsBuf = gph.genArrayBufferSendData(new float[]{
            0.0f, 0.5f, 0.0f, 0.0f, 0.0f, -0.5f});
S8-7. In the postUpdate method, after the disabled line which contains sendUvec2("pos", add the following line:
gph.bindVaf("pos", pointPosWsBuf, 2);
S8-8. Continue in the postUpdate method, blow the fragment shader, after the disabled line which contains gph.drawPoints(1), add the following line:
gph.drawPoints(3);
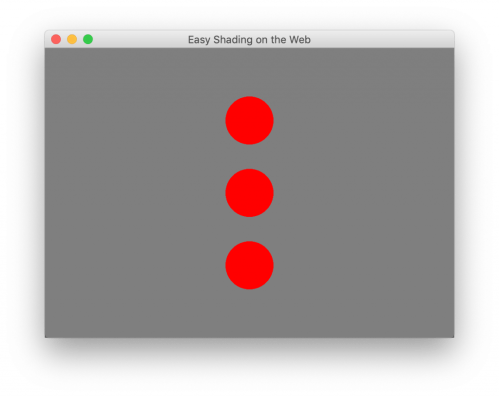
Make sure that the Case title is ‘TrafficLightS8′. Click on ‘Build C3dapp for the case‘ to build and run the case.
If the building process is successful, C3dapp Studio switches to the ‘Built Cases’ tab within which an app showing three red disks is displayed under the case title ‘TrafficLightS8′.
Click on ‘Open case‘ under the case title ‘TrafficLightS8′ to get back to Case Editor.
Note that the Case tile is now TrafficLightS8_1. Change it to TrafficLightS9.
Coding Session 9 – Variation
S9-1. Disable the following line with double slashes:
//private float[] pointColor;
S9-2. In the canvasReady method, disable the following line with double slashes:
//pointColor = new float[]{1.0f, 0.0f, 0.0f};
S9-3. In the postUpdate method, disable the following line with double slashes:
//gph.sendUvec3("color", pointColor);
S9-4FS. In the main() function of the fragment shader, disable the following line with double slashes:
//gl_FragColor = vec4(color, length(vq1) < rad);
S9-5. Back to the top part of the code, after the line which contains private int pointPosWsBuf, add the following line:
private int pointColorBuf;
S9-6. In the canvasReady method, add the following lines after the existing lines:
        pointColorBuf = gph.genArrayBufferSendData(new float[]{
            1.0f, 0.0f, 0.0f, 1.0f, 0.7f, 0.0f, 0.0f, 0.8f, 0.0f});
S9-7. In the postUpdate method, after the line which contains bindVaf("pos", add the following lines:
        gph.bindVaf("color", pointColorBuf, 3);
        gph.passVvec3("vColor");
S9-8VS. In the main() function of the vertex shader, add the following line after the existing lines:
vColor = color;
S9-9FS. In the main() function of the fragment shader, add the following line after the existing lines:
gl_FragColor = vec4(vColor, length(vq1) < rad);
Make sure that the Case title is ‘TrafficLightS9′. Click on ‘Build C3dapp for the case‘ to build and run the case.
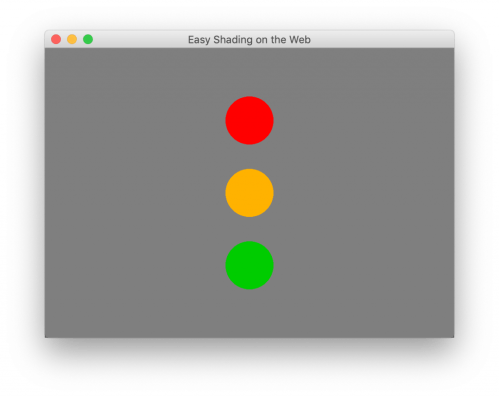
If the building process is successful, C3dapp Studio switches to the ‘Built Cases’ tab within which an app showing a set of traffic lights is displayed under the case title ‘TrafficLightS9′.
4. The completed App Code
Click on ‘Open case‘ under the case title ‘TrafficLightS9′ to open the completed App Code in the Case Editor. A copy of the code is as follows.
package com.ohs.gt.client;

import dmive.core3d.app.AppClient3D;
import dmive.core3d.intf.Grapher;

public class GtAppClient extends AppClient3D {

    private Grapher gph;
    private int program;
    private float pointSizeGu;
    //private float[] pointColor;
    private float cornerRad;
    //private float[] pointPosWs;
    private int pointPosWsBuf;
    private int pointColorBuf;

    @Override
    public void canvasReady() {
        gph = getGrapher();
        program = gph.initProgram(0);
        pointSizeGu = 60 * gph.getPGR();
        //pointColor = new float[]{1.0f, 0.0f, 0.0f};
        cornerRad = 0.5f;
        //pointPosWs = new float[]{0.0f, 0.5f};
        pointPosWsBuf = gph.genArrayBufferSendData(new float[]{
            0.0f, 0.5f, 0.0f, 0.0f, 0.0f, -0.5f});
        pointColorBuf = gph.genArrayBufferSendData(new float[]{
            1.0f, 0.0f, 0.0f, 1.0f, 0.7f, 0.0f, 0.0f, 0.8f, 0.0f});
    }

    @Override
    public void postUpdate() {
        gph.setBackground(0.5f, 0.5f, 0.5f, 1.0f);
        gph.bindProgram(program);
        gph.sendUfloatPointSize("pointSize", pointSizeGu);
        //gph.sendUvec3("color", pointColor);
        gph.sendUfloat("rad", cornerRad);
        //gph.sendUvec2("pos", pointPosWs);
        gph.bindVaf("pos", pointPosWsBuf, 2);
        gph.bindVaf("color", pointColorBuf, 3);
        gph.passVvec3("vColor");
        /*------------------------------------------------- vertex shader for P0
        void main() {
            //gl_Position = vec4(0, 0, 0, 1);
            gl_Position = vec4(pos, 0, 1);
            gl_PointSize = pointSize;
            vColor = color;
        }
        //~~~~~~~~~~~~~~~~~~~~~~~~~~~~~~~~~~~~~~~~~~~~~~~~~~~~~~ fragment shader
        void main() {
            //gl_FragColor = vec4(1, 1, 1, 1);
            //gl_FragColor = vec4(color, 1);
            vec2 pfa = abs(gl_PointCoord - 0.5);
            vec2 vq1 = max(pfa + rad - 0.5, vec2(0, 0));
            //gl_FragColor = vec4(color, length(vq1) < rad);
            gl_FragColor = vec4(vColor, length(vq1) < rad);
        }
        //-------------------------------- end of vertex and fragment shaders */
        //gph.drawPoints(1);
        gph.drawPoints(3);
        gph.unbindProgram();
    }
}
5. Download and save the case on your computer
Continue to work in C3dapp Studio. In the ‘Built Cases’ panel, Click on ‘Save and download case’ under case title ‘TrafficLightS9’ to save the case on your local computer. The case file with name ‘TrafficLightS9.zip’ that has been downloaded can be saved in your chosen folder for later use.
6. Next steps
Tutorial Volume 1 – Essential Shading in C3dapp Studio contains more details on how to create a set of traffic lights and interact with it.
Tutorial Volume 2 – 3D Scene Construction in C3dapp Studio contains a range of tutorials on 3D scenes, animation and user interactions.